Documentation
Policy Manager Pro is an electronic Policy and Procedure management tool. It's a web application and is offered under the Software As a Service model.
1.2 FeaturesSome of the key features of Policy Manager Pro are:
- Easily link to other policies
- Ensure everyone is using the current policy
- Automatic archival of previous versions of a policy
- Get email notifications when a policy has been updated
- Get email notifications when a policy is due for review
In working with some of my nursing facility clients, I saw a need for a better way to keep their policy books updated and in compliance with department of health regulations. Some of the problems with paper policy books were that there were sometimes more than one "version" of a policy in different locations. In addition, it was difficult and time-consuming for department managers to keep their policies reviewed and updated as required by regulations. Thus, in 2014 the first version of Policy Manager Pro was released to a limited number of beta testers. Response was positive from the department managers, and since then I've incorporated many of their suggestions and feature requests into the current version. While it was originally designed for nursing homes and assisted living facilities, it could easily be used by any company that must maintain Policy and Procedure books.
Your policy book is divided into "Sections". Usually, they will correlate to the departments of your facility. For example, you likely have a Maintenance department, an IT department, and an Administrative department, among others. So it's logical that you would have your policy book divided likewise, however, that's entirely up to you. To create a new section, click the Sections menu item and type the desired name in the appropriate box and click Create.
2.2 Section NameThis is what you will see in the table of Contents and in the Header printed at the top of each policy in that section. You can change the section name at any time - what you see on a policy is dynamically pulled from the database, and so will reflect any changes immediately. Again, using the example above, you might have a Maintenance section, and IT-Computers section, and an Administration section.
2.3 Section NumberThe section number is initially assigned automatically when you create the section, using the next available number. You can change it to any one or two digit number not currently in use for another section. Policy numbers are comprised of two portions in the format XX.XXX, where the first portion (before the dot) is the section number and the second portion (after the dot) is the policy number. The ability to change this number was implemented to accomodate existing numbering schemes so that the numbers in Policy Manager Pro would match previous paper books.
2.4 EditorsEach section has it's own list of editors. An editor is simply a user who has permissions to modify policies in this section. However, they cannot approve changes (see below for a full description of the approval process). A user may be an Editor for more than one section, and may be both an Editor and a Manager if desired. Only admin users may edit Sections, assigning users to be Editors and Managers. To make a user an editor for a section, click the Sections menu item and click the edit button next to the Section you wish to modify. In the Editors field, highlight the user name in the left box, click the >> button to move that user to the editors box, and save your changes. To remove a user, simply reverse the procedure, moving the user to the left.
2.5 ManagersEach section has it's own list of managers. A manager is a user who can approve changes to policies (see below for a full description of the approval process). To make a user a manager for a section, use the same steps as for editors, using the Managers field instead. Note: a user may be both an editor and a manager for a section. Being a manager does not give the user edit rights.
- 3.1 Overview
- 3.2 Creating a Policy
- 3.3 Editing a Policy
- 3.4 Approving Changes
- 3.5 Reverting Changes
- 3.6 Reviewing a Policy
- 3.7 Printing a Policy
- 3.8 Policy Navigation
- 3.9 Renumbering a Policy
There are three parts to a policy - the header, the policy text, and the procedure text.
The header of a newly created policy can be seen in the screen capture below:

Some things to notice are that the policy has not yet been approved, and in the navigation area on the left there are no archived copies of this policy.
Whereas in this next screen capture you can see the header of a policy which has been approved:

In this case, instead of a link to "Approve" the policy, you see the name of the user who approved it. Also notice the two archived copies of the policy in the navigation area to the left.
When creating a new policy, choose a section from the drop-down list. The list will show all sections in which you are assigned as an editor. The policy number will be automatically generated based on the next available number in the section chosen. The Subject (or Title) is what will show up in the table of contents along with the policy number. There are two text editor areas below the header, one for the Policy statement and one for the Procedure text.
3.3 Editing a Policy
Whether you are editing an existing policy, or creating a new policy, the functionality of the text editor is the same.
At the top of the editor box, you have a toolbar which is similar to what you may be familiar with in a word processor.

If you highlight a section of text and click one of the buttons, whatever function that button performs is applied to the highlighted text.
Most of the buttons are self-explanatory and simple to use, however there are a couple that seem to generate questions from users so I'll cover them here.
First, the link button -  - this is used to create a hyperlink (i.e. to another policy or a pdf form).
You can use this to link to external sources, like department of health websites, by simply typing (or copying and pasting) the url of the site.
If linking to an external url it is a good idea to set target to "New Window" so the browser remains open at Policy Manager and opens the linked page in a new window.
To assist you in linking to another policy or to an uploaded pdf file, you will find two items in the Link list drop-down.
Both these items will put a sample url in the url box that is appropriate to your facility configuration.
If you are linking to an uploaded PDF file, you just need to replace the sample pdf name with the one you actually want to link to, and then choose "New Window" in the Target drop-down.
This causes the hyperlink to open a new window to display the pdf file, instead of replacing the policy manager page.
If you are linking to another policy, there are two things you need to replace in the sample url, the section name and the policy number.
And in this case you want the target to stay the default "None".
- this is used to create a hyperlink (i.e. to another policy or a pdf form).
You can use this to link to external sources, like department of health websites, by simply typing (or copying and pasting) the url of the site.
If linking to an external url it is a good idea to set target to "New Window" so the browser remains open at Policy Manager and opens the linked page in a new window.
To assist you in linking to another policy or to an uploaded pdf file, you will find two items in the Link list drop-down.
Both these items will put a sample url in the url box that is appropriate to your facility configuration.
If you are linking to an uploaded PDF file, you just need to replace the sample pdf name with the one you actually want to link to, and then choose "New Window" in the Target drop-down.
This causes the hyperlink to open a new window to display the pdf file, instead of replacing the policy manager page.
If you are linking to another policy, there are two things you need to replace in the sample url, the section name and the policy number.
And in this case you want the target to stay the default "None".
The next set of buttons that sometimes cause confusion are the "List" and "Indentation" buttons.
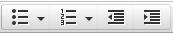
They are (left to right), unordered list, ordered list, move indentation left, move indentation right.
Lists are handy for arranging text in outline format. The easiest way to explain them is with an example. Start with the five lines below in your editor:
Line one
Line two
Line three
Line four
Line five
Highlight all five lines and click the ordered list button. Now you have:
- Line one
- Line two
- Line three
- Line four
- Line five
- Line one
- Line two
- Line three
- Line four
- Line five
When a policy has been changed, those changes must be approved by a manager. Until they have been approved any printed copies will have a notation at the top that they are draft versions as yet unapproved. Approving the policy changes does several things:
- sets the review date of the policy to the current date
- sets the revision date of the policy to the current date
- archives a copy of the policy in it's current state
- attaches the name of the person who approved the policy
- if the configuration item "Send system emails to administrator" is set, an email gets sent to the facility administrator stating that changes were approved and by whom.
The archived copies of a policy allow editors to undo changes and revert to a previous copy of the policy. The top archive copy is always the last approved state of the policy. If there have been no changes to the policy since it was approved, that copy will be identical to the current copy.
To illustrate how this could be helpful, consider the following scenario:
Jane is the manager of the IT section, and Mary is an editor for that section.
Mary makes changes to policy number 4.105 and saves them. (at this point the policy is in a draft state)
Jane gets an email that policy 4.105 has been changed and needs approval. Jane then logs in and uses the "diff" link beside the top archive copy to see what has changed.
Jane decides that the changes are not in line with the goals of this policy and so can simply click the "revert" link beside the top archive copy, changing the policy back to it's previous state.
To remain in regulatory compliance, you are likely required to review all policies on an annual basis. Policy Manager Pro makes it easy.
When a policy is approved the review date is stamped with the current date. Then when the review date is nearing one year of age, managers for that section will get an email reminding them that there is a policy that needs to be reviewed.
In many cases the policy will not need revision, and you can simply click the "Update" link next to the review date, giving you another year before you need to review it again.
Using the "Print" link at the top of the policy window, or the one beside the policy number in the table of contents, generates a pdf document which can be printed or saved to disk. Depending on your browser settings this pdf document may open in your browser, or it may open in a pdf reader (i.e. Adobe Reader).
3.8 Renumbering a PolicyBy default, new policies get the next available policy number for the section in which they are created. Editors may change the policy number of an existing policy by using the edit link. Below are two example scenarios where this would be useful.
Example scenario 1: You have many policies already in section number 4, with numbers ranging from 4.100 through 4.165. You wish to insert a new policy as number 4.129, so you create the new policy and it is assigned 4.166 when you save it because that is the next available number in that section. Now open the policy in the editor and change the number to 4.129 and click the save button. This will renumber all the policies from 4.129 through 4.165, shifting them to the right, i.e. adding one to each of their numbers so that they are now numbered 4.130 through 4.166. This creates the "hole" for the one you are saving as 4.129.
Example scenario 2: You are setting up a new section/department and you want to subdivide the policies of that section so that the numbers are 4.100 - 4.125, 4.200 - 4.240, and 4.300 - 4.365. First enter policies 100 through 125, then enter the policy you want to be policy number 4.200. It will get 4.126 when you save it. Then open that policy in the editor again and change the number to 4.200 and save it. When you create the next new policy it will automatically get 4.201. Repeat this process when you get to the policy you wish to be 4.300 and so on and so forth... At any time you may come back and insert a policy into the "spaces" between subdivisions by first creating the policy, then editing the number to be any unused number.
The purpose for the uploads feature is to accomodate policies that need attachments - for example a pre-existing form that will need to be printed and filled out. In the case of such forms it may make more sense to attach it to the policy using a hyperlink instead of creating it as part of the policy itself. See 3.3 Editing a Policy for instructions on how to hyperlink an uploaded file to a policy.
What NOT to upload:
- You should not upload scanned copies of the policy itself as a substitute for typing the policy into the editor, or anything else that should be part of the policy and procedure text. One major reason for this is because uploads are not indexed by the search engine, whereas policy and procedure text are. Another reason is that uploading a policy in this way negates many of the advantages of using Policy Manager Pro over paper policy books.
- You should not upload scanned copies of a state or federal regulation. You should instead create a hyperlink to the state or federal website where that regulation is posted. This ensures that your policy will always reference the most current regulation, without you having to worry about updating the policy and/or uploaded files when the regulation changes.
Only pdf attachments are accepted. Filenames may not contain spaces or special characters (underscore being the only exception). File size of less than 1MB is recommended, 2MB max. A typical pdf form is about 400k.
4.3 TroubleshootingSome of the common causes of upload failure:
- Based on your subscription level, you have a limited amount of server space for uploads. If you have exceeded that quota, the upload could fail. Given the individual file size limits and the generous space allowed for each subscription level, you would need at least 50 to 100 uploads for this to be the problem.
- You are trying to upload a Word document. We only accept PDF files as uploads.
- Your file has a name with disallowed characters - i.e. spaces. (see above format requirements)
- Your file failed the anti-virus scan during the upload process.
The search feature allows you to search the text of the policy and procedure portions of each policy. Your facility's database is indexed by the search engine each night, and so any new policies will not show up in search results until the following day.
"What if I only want to search policy titles?"
To only search within policy titles, click the "Table of Contents" link in the left pane and use your browser's built-in "search this page" feature. For example, in Firefox, press F3 and start typing your search term, then use either the F3 key or the up and down arrow buttons next to your search box to navigate through the results.
Beginning with version 2.0.1, each user at your facility will probably need their own login to Policy Manager Pro. This allows department managers to assign tasks to individual users so you can document and audit that your staff have read and understand your policy book. You may also still have "generic" logins for staff or auditors, but these wouldn't be used with the tasks feature.
6.2 EditingTo edit existing user accounts, or to add new user accounts, click the Users menu item. Only admins will have the Users menu item. To edit an existing user click the edit button next to the user name you wish to modify. To create a new user account use the form at the bottom of the user list.
6.3 Active/InactiveThe default list of users only shows the active user accounts. If you want to see the entire list, including inactive accounts, click the link above the list "show inactive users". This will allow you to re-activate an account that has been disabled. User accounts cannot be deleted, they can only be disabled.
6.4 PermissionsMaking a user an admin will give them the menu items for editing users, groups, sections, and the facility config. To make a user an editor or manager, you edit the section not the user.
Groups were added in version 2 to facilitate the assignment of tasks. A user may be in more than one group. The "All Users" group is created by default. There is no limit on the number of groups you create.
The Tasks feature was added in version 2. Tasks offer a way to assign users a policy or group of policies which they need to read and acknowledge that they understand. This could be used for new staff members, to assign the entire policy book, or to existing staff for policies that have changed. This provides a mechanism for auditing and reporting for compliance. See the reporting section for more on reports.
8.2 Creating a TaskTasks are assigned to Groups, so make sure you have already created a group and added the appropriate users to that group before creating the task. Click the Tasks menu item and type the name you want to call this task in the box, then click the Create button. This will present you with a page to set the options for this task.
If this is going to be a task that you want to stay active for some time, and it gets assigned to any user added to the assigned group in the future, then check the box for that option. That will make the due date relative to the date the user is added to the group. The default is for this box to be unchecked - the task will be assigned to users in that group already, with a definite due date, and users who are added to the group(s) in the future will not be assigned this task. An example of a task that you may want to check this box: you have one or more policies that you want all new employees to acknowledge that they have read and understand, so you create a group called "New Employees" and assign those policies to that group, checking this box and the one to "Remove this user from group when task complete".
To assign one or more policies to this task, click the section name to expand the list of policies for that section, then click the box for the policies you wish to assign with this task.
8.3 Editing a TaskTo edit an existing task, click the edit button beside the task name. This presents you with the same screen as when creating a new one, but with the fields populated with the pre-existing values.
New reports are being worked on...currently there are 4 available. This page will be updated when more are complete.